
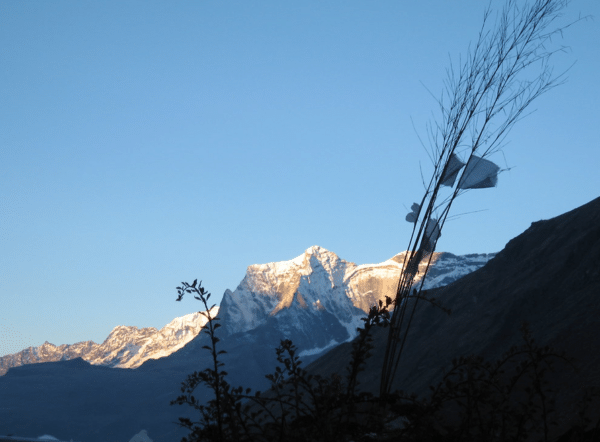
Not every person who wants to see the world’s highest mountain needs to spend three weeks on a trail with an expedition team. The short Everest trek for beginners exists precisely for people who want a genuine Himalayan experience without committing to a full Everest Base Camp journey. Whether you have limited time, limited trekking experience, or simply want to test yourself in the mountains before taking on something bigger, there is a well-established route that reaches some of the most rewarding viewpoints in the Everest region within a shorter, more manageable schedule.
This guide covers everything a first-time trekker needs to know before setting off, from the best routes and what to expect on the trail to fitness requirements, costs, and the practical details that make the difference between a stressful trip and a genuinely good one.
What Does a Short Everest Trek Actually Look Like?
The Everest region covers a large area of northeastern Nepal, and not all of it requires two to three weeks to reach. A short Everest trek for beginners typically targets two main destinations: Namche Bazaar at 3,440 meters, and Tengboche Monastery at 3,860 meters. Both offer views of Everest and the surrounding peaks that are clear, close, and genuinely rewarding. Neither requires the physical endurance of a full base camp journey.
The most commonly recommended short route runs from Lukla, where you fly in from Kathmandu, to Namche Bazaar and back. This typically takes seven to nine days and reaches an altitude high enough to be considered a real mountain trek without crossing into the territory where altitude sickness becomes a serious daily management issue. Some trekkers extend this to include Tengboche, which adds two or three days and brings the route to around ten to twelve days total.
Both options are well within reach for someone who is reasonably fit and has done some preparation walking before the trip. The easy Everest trek Nepal routes attract thousands of first-time trekkers every year precisely because the infrastructure and trail conditions make the experience accessible. You do not need mountaineering experience. You do not need specialist equipment beyond warm layers and a good pair of broken-in trekking boots. What you do need is an understanding of what the trail involves and a realistic approach to the pace.
Best Short Routes in the Everest Region for Beginners
Choosing the right route is the most important first decision for anyone planning an easy Everest trek in Nepal. The routes below suit first-time trekkers well and can be completed in a range of timeframes depending on how much time you have available.
| Route | Duration | Max Elevation | Highlights |
| Lukla to Namche Bazaar and back | 7 to 9 days | 3,440 m | Sherpa villages, Hillary Bridge, first Everest views |
| Lukla to Tengboche and back | 10 to 12 days | 3,860 m | Namche, Tengboche Monastery, wider mountain panorama |
| Jiri to Namche (overland entry) | 10 to 14 days | 3,440 m | Traditional route, less flight-dependent, more gradual ascent |
For most beginners, the Lukla to Namche and back route or the extension to Tengboche is the right starting point. The Kala Patthar option reaches a high altitude that requires solid preparation and is not well-suited to someone with no prior experience at elevation. The Jiri entry is a longer approach that suits trekkers who want to avoid the Lukla flight or who have more time available.
How Fit Do You Need to Be?
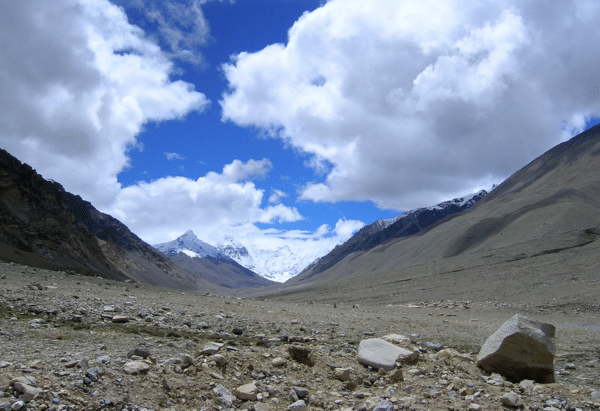
This is the question most first-time trekkers ask before anything else. The honest answer is that the short Everest trek for beginners does not require elite fitness, but it does require preparation. The trail involves walking for five to seven hours a day on terrain that includes steep ascents, uneven stone paths, suspension bridges, and sections of loose ground. Doing this for seven to twelve consecutive days with a daypack on your back is a genuine physical undertaking.
A sensible preparation programme in the months before departure includes regular walking or hiking on varied terrain, building up to three to four hours of continuous walking with a light pack. Stair climbing is particularly useful because much of the ascent on this route involves steps cut into stone. Cardiovascular fitness helps with the altitude sections, where reduced oxygen makes even moderate exertion feel harder than it would at sea level.
You do not need to be a runner or a gym athlete. People of a wide range of ages and fitness levels complete this route every year. What matters is that you arrive having done some preparation rather than starting a ten-day mountain trek without any base fitness at all.
Altitude and What to Expect
Everest trekking tips for beginners always include a section on altitude, and for good reason. The Lukla to Namche route rises from 2,860 meters at Lukla to 3,440 meters at Namche. The elevation gain on the climb from Phakding to Namche alone is around 800 meters over a single day, and most trekkers feel the change in air quality somewhere on that section.
Headache, fatigue, dizziness, nausea and disturbed sleep can occur at altitude. These symptoms should be taken seriously, and trekkers should not continue ascending if symptoms are worsening. Most structured itineraries build in an acclimatisation day at Namche Bazaar before continuing. This is not optional. The body needs time to adjust before moving higher, and the Namche day is specifically there to allow that. Skipping it to save time is one of the more common mistakes first-time trekkers make.
Drinking three to four litres of water daily, avoiding alcohol on the first few days at elevation, eating well, and taking the pace seriously are the most practical steps. If symptoms worsen rather than improve after a rest day, descending is always the correct decision.
Costs and Permits You Will Need
An easy Everest trek in Nepal requires several permits and registrations. For current trekking arrangements in the Everest region, trekkers should plan for the Sagarmatha National Park entry permit, the Khumbu Pasang Lhamu Rural Municipality fee and the required TIMS card arranged through a registered trekking agency.
The Sagarmatha National Park entry fee for foreign visitors is currently NPR 3,000 per person. The Khumbu Pasang Lhamu Rural Municipality fee is currently NPR 3,000 for visitors from countries other than SAARC countries and China, while different rates apply to SAARC and Chinese visitors. TIMS fees also vary according to the traveller’s category.
| Expense | Approximate Cost |
| Sagarmatha National Park permit | NPR 3,000 |
| Khumbu Pasang Lhamu Rural Municipality fee | NPR 3,000 for most foreign visitors |
| TIMS card | Current fee depends on traveller category |
| Kathmandu to Lukla return flight | Around USD 200 to USD 340 |
| Guide service | Varies by agency and service level |
| Porter service | Varies by agency and service level |
| Teahouse accommodation | Around USD 5 to USD 15 per night |
| Meals on the trail | Around USD 15 to USD 30 per day |
| Travel insurance | Varies by provider and coverage |
| Gear rental | Varies according to equipment |
These figures are indicative rather than fixed prices. Flight fares, accommodation, guide and porter costs, food prices and other expenses can change according to season, availability and the trekking company you use.
For a short Everest trek for beginners, it is better to request a current package quotation from a registered trekking agency rather than relying on a single fixed total budget. This also allows the cost of the guide, permits, TIMS, accommodation, meals and transportation to be confirmed before departure.
What to Pack and What to Leave Behind
A few simple packing principles apply here: bring less than you think you need and make sure the essentials are right. The trail has teahouses at regular intervals where meals and basic supplies are available. You do not need to carry food or camp equipment. What you do need to carry or wear is appropriate for the temperature range, which can go from pleasantly warm during the day to well below freezing at night above Namche.
The non-negotiable items are:
- Broken-in, ankle-supporting trekking boots worn on the plane so they are not new on day one of the trail
- Warm insulating layers including a down jacket for evenings and nights
- Waterproof jacket and waterproof trousers for rain and wind
- Trekking poles, which reduce knee strain on the significant descents
- A sleeping bag rated to minus ten degrees Celsius for the teahouses at higher elevations
- Sunscreen and UV-protective sunglasses for high altitude sun exposure
- A basic first aid kit and any personal medications
Gear that can be hired or purchased in Kathmandu’s Thamel neighbourhood is widely available and of reasonable quality. If you are missing any major items, Thamel is a practical place to fill the gaps before departure.
Do You Need a Guide?
The short Everest trek for beginners is well-marked and follows a path used by thousands of trekkers each year. Current regulations require trekkers on applicable Everest region routes to travel with a licensed trekking guide and obtain the required TIMS card through a registered trekking agency.
Local knowledge on this route makes a real difference. A good guide knows where to eat, which teahouses are clean and well-run, how to read the weather, and when to suggest slowing down before a trekker recognises the need themselves. They also manage the logistics that can absorb significant time and energy on a first trip: negotiating permits, coordinating with porters, and communicating in Nepali where needed.
A porter is a separate and equally practical addition. Carrying a heavy pack over steep high-altitude terrain is a very different proposition from carrying the same weight on a flat city walk. A porter handles the main pack while you carry only a light daypack, which makes the walking considerably more manageable and allows you to focus on the experience rather than the physical load.
Best Time to Do a Short Everest Trek
Easy Everest trek Nepal routes can be done year-round, but the experience varies considerably by season. October and November are the most popular months and for good reason. The skies are clear after the monsoon, mountain views are at their best, temperatures are cold but manageable, and the trails are in good condition.
March and April are the second-best window. The days are warmer, rhododendrons bloom along the lower sections of the trail, and the mountain views remain clear. This season is slightly less crowded than autumn, which some trekkers prefer.
December and January are cold, particularly above Namche, but the trails are very quiet and the mountain views on clear days are excellent. February can bring unpredictable weather and snow at higher elevations. The monsoon months of June through August bring heavy rain, leeches on the lower trail sections, and poor visibility, making this the least favourable period for a first-time visit.
A Few Final Thoughts
The short Everest trek for beginners provides a practical way to experience the Everest region without committing to the longer Everest Base Camp route. The Everest region has established trekking infrastructure, including teahouses, established trails and regular trekking services, but trekkers still need to prepare for altitude, weather and changing trail conditions.
The views of Everest, Lhotse, Ama Dablam, and the surrounding peaks are available to anyone willing to walk the trail with reasonable preparation and a sensible pace.
Everest trekking tips for beginners come down to a few consistent points: prepare physically before you go, choose an itinerary with enough days built in for proper acclimatisation, carry the right gear, travel with a guide if it is your first time at altitude, and approach the trail with patience rather than urgency. The mountain is not going anywhere. The pace that keeps you healthy and safe is always the right one.
